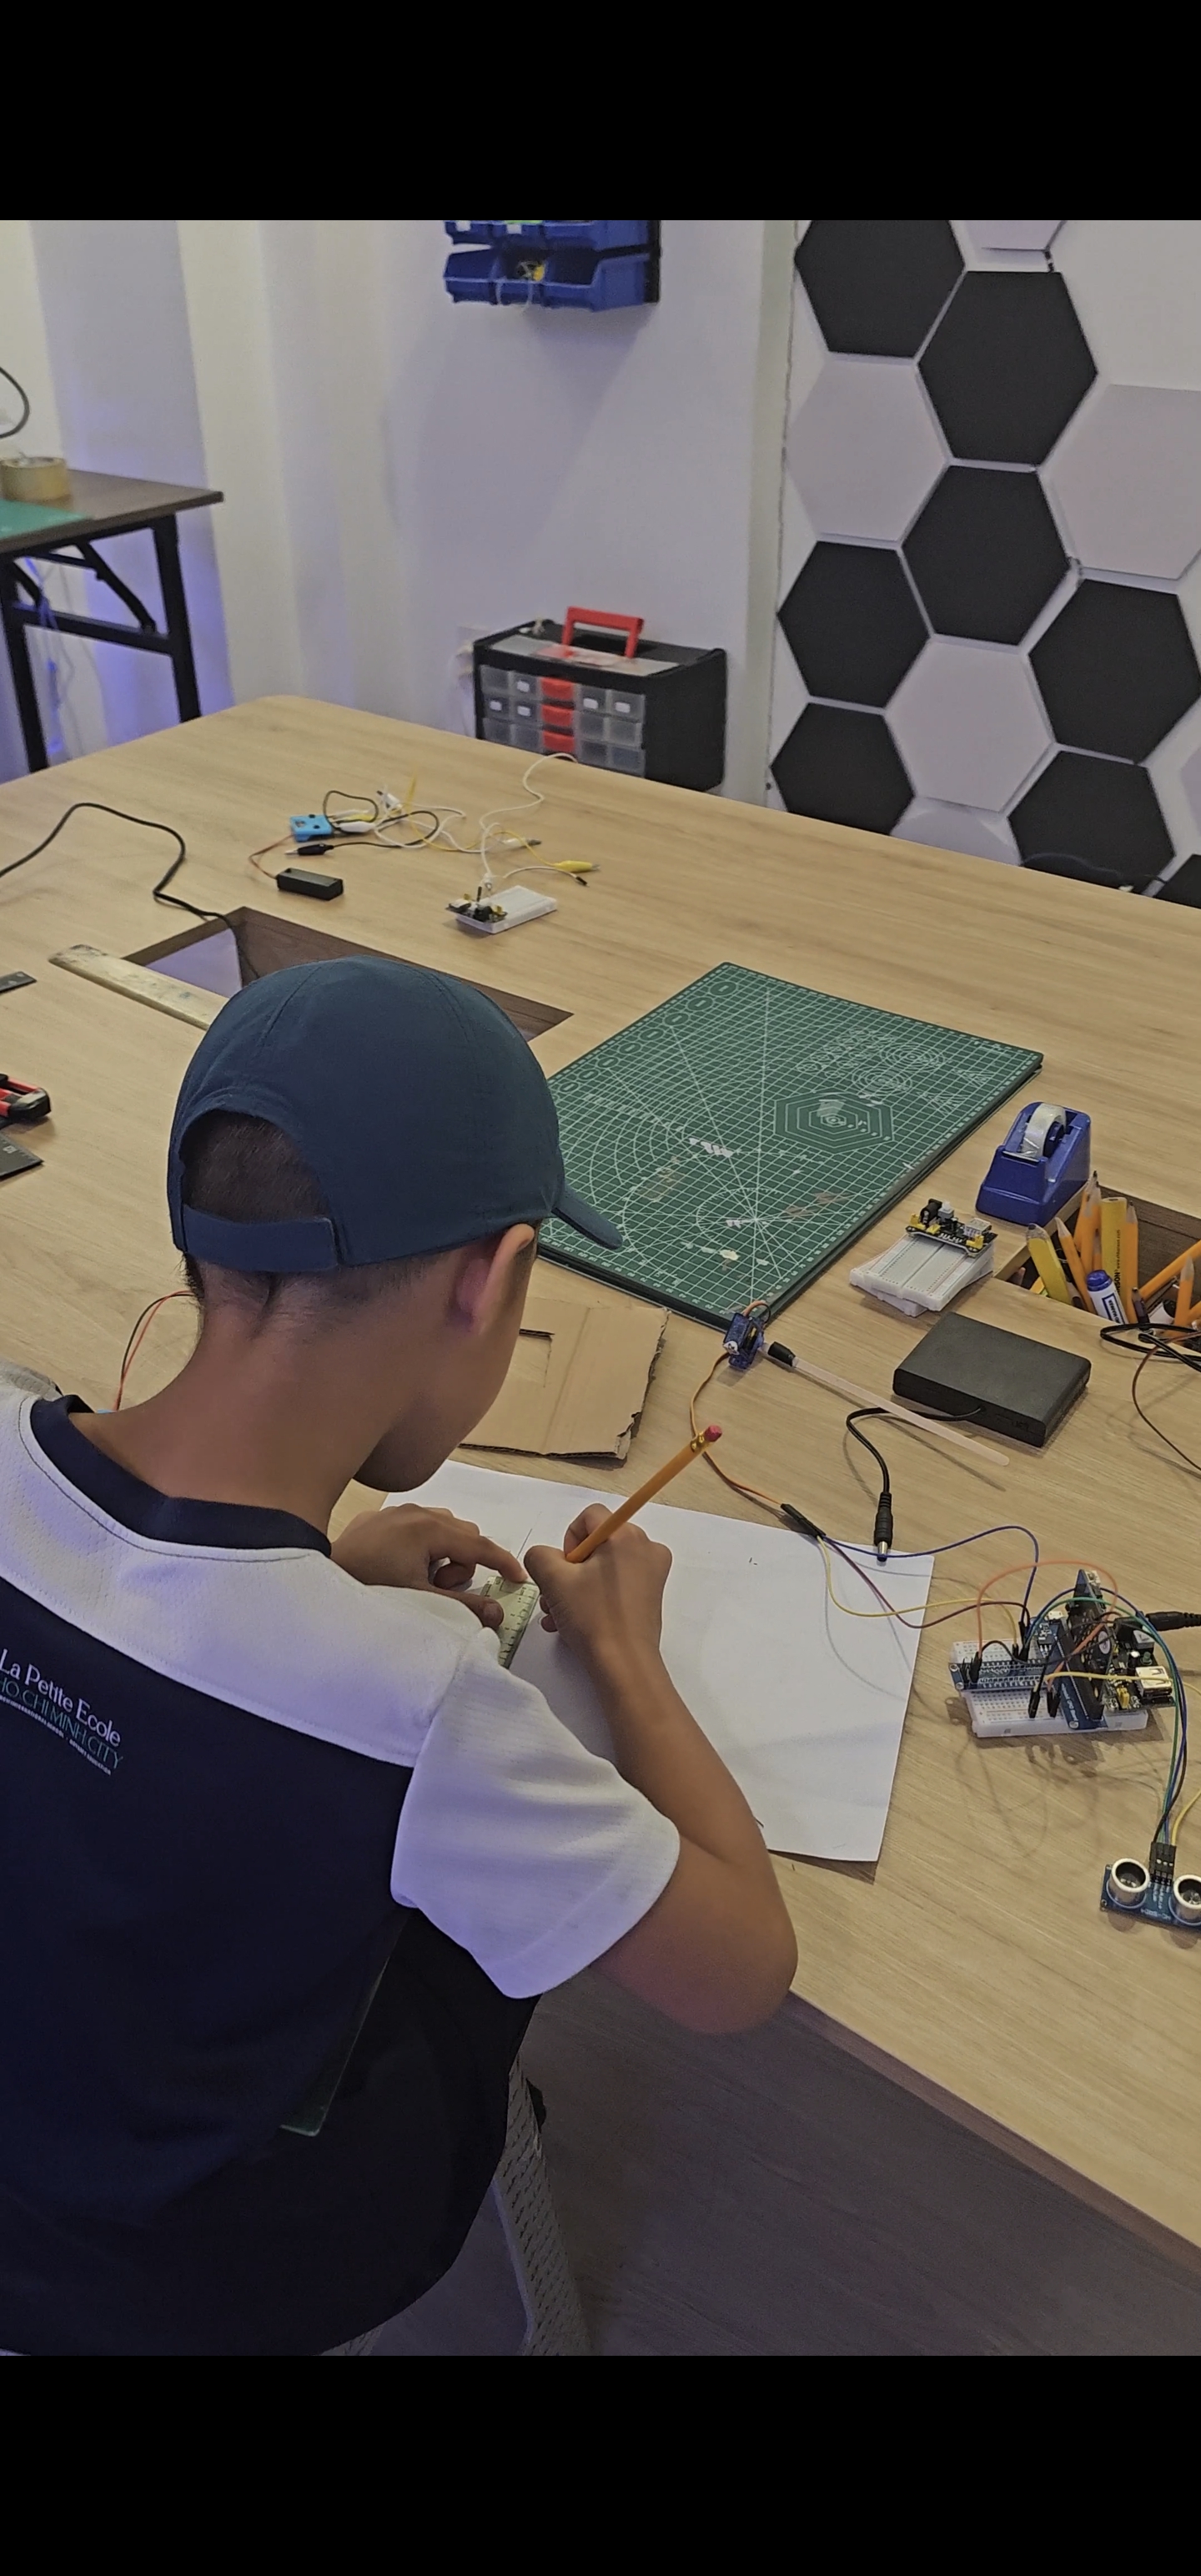
3D Printers & Motorized Motion
Design, print, and power your own creations. In 3D Printers & Motorized Motion, students explore how 3D printing, coding, and electronics come together to make things move. Using Micro:bit, motor driver boards, and custom 3D-printed parts, they build intelligent models that drive, react, and race.
Ages 8–12 · 90-minute classes · Hands-on projects · Small groups

What students build & learn
In 3D Printers & Motorized Motion, students bring their designs to life by learning how to power, steer, and control moving creations using motors, sensors, and 3D-printed parts.
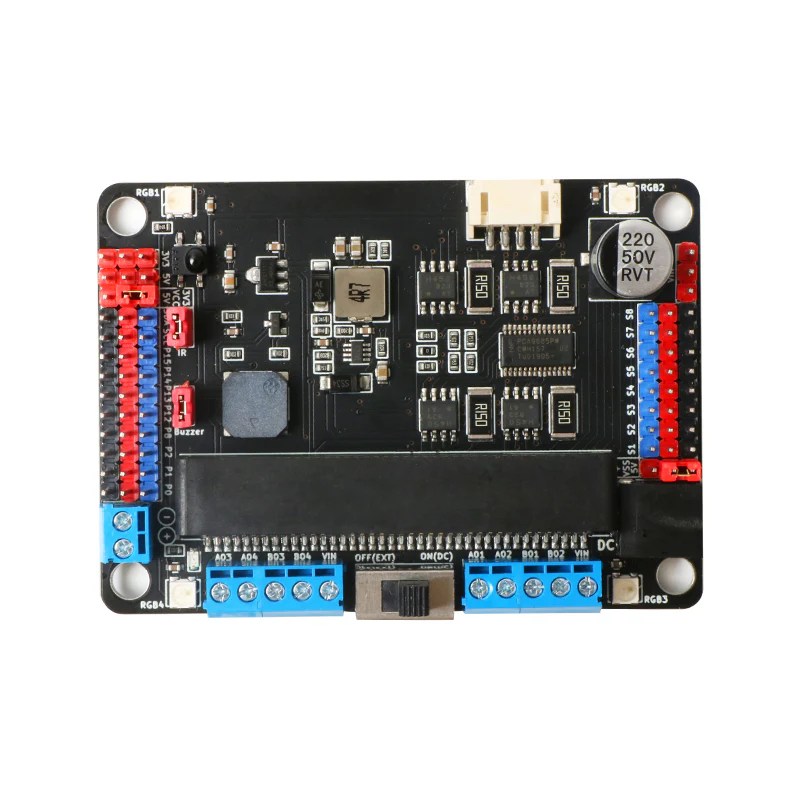
Motors & power systems
Students explore DC and servo motors, learn how driver boards distribute power, and experiment with polarity, torque, and safe voltage for motion control.
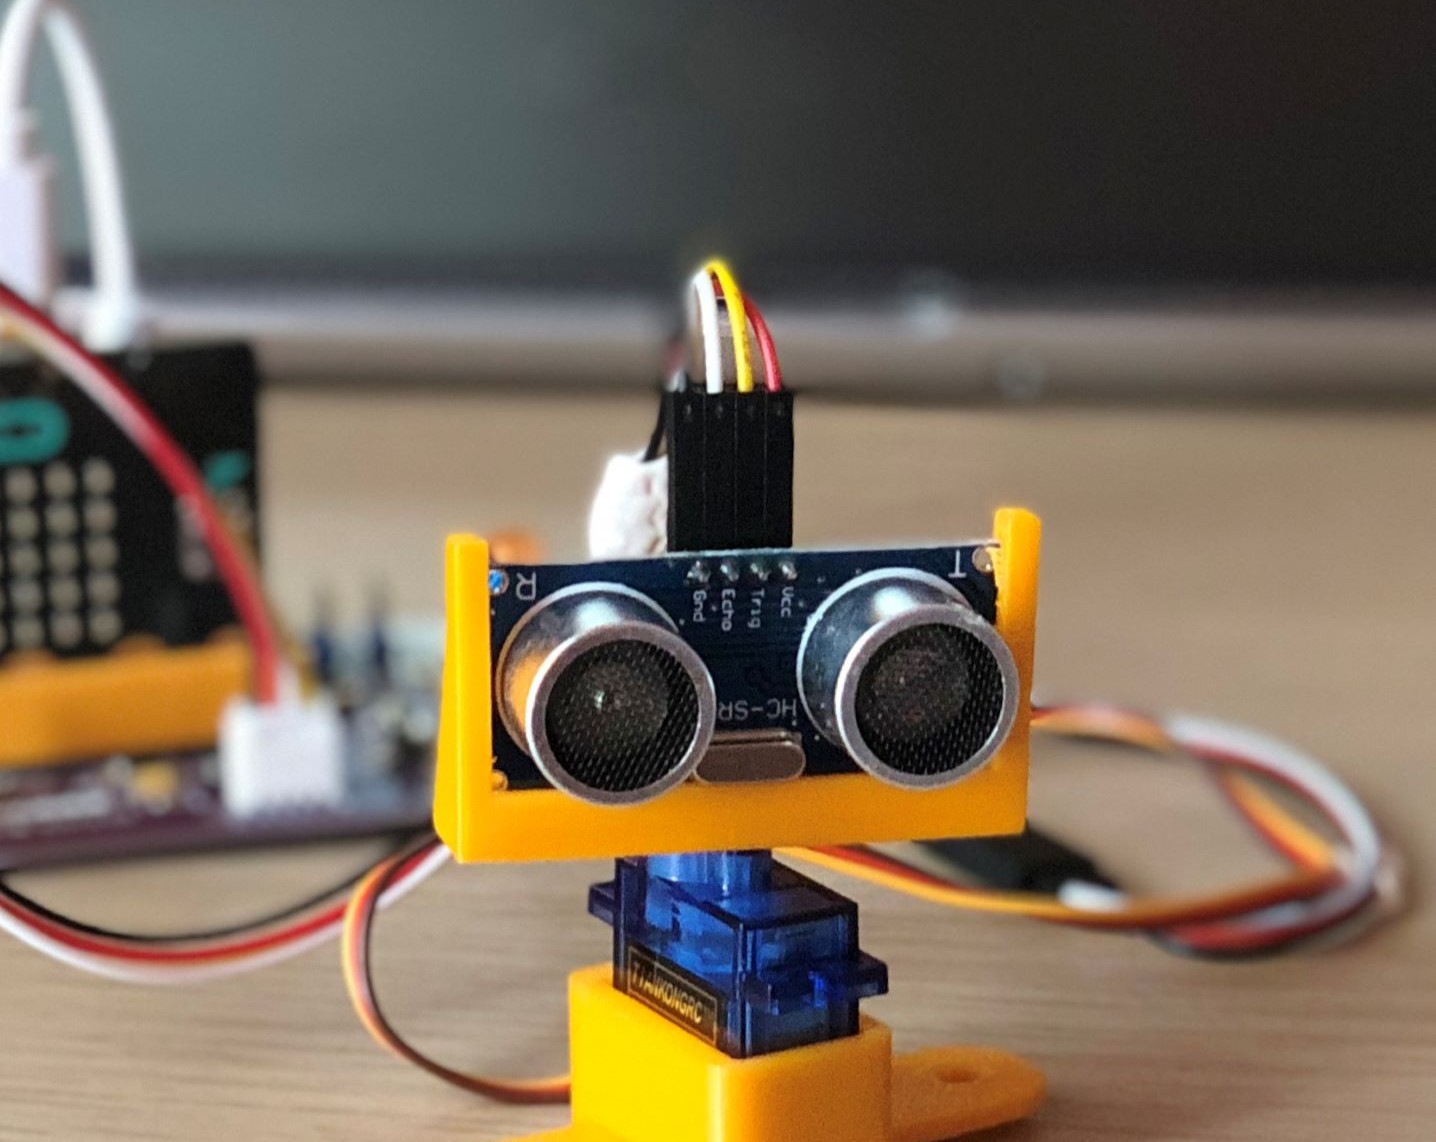
Sensors & smart control
Vehicles respond to their surroundings using ultrasonic, light, and sound sensors. Students learn how data and logic work together to guide motion and avoid obstacles.
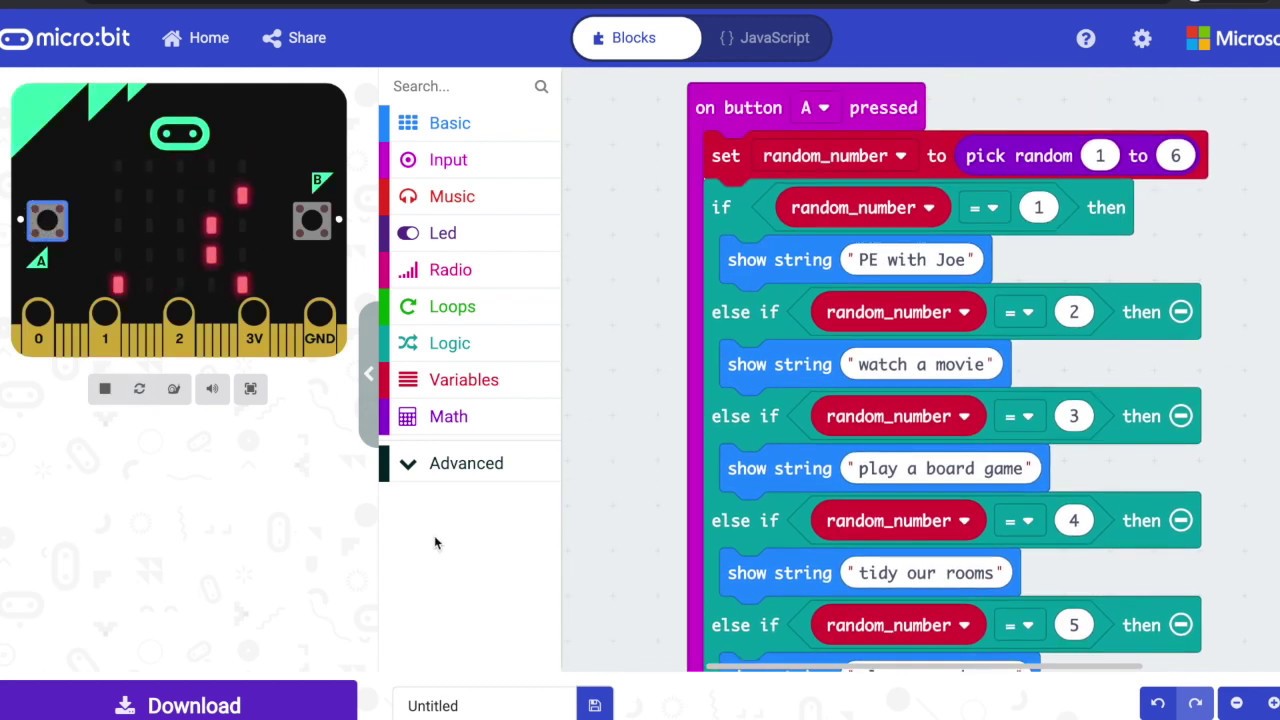
Coding for motion
Using Microsoft MakeCode, students program direction, speed, and timing. They apply loops, conditionals, and event handling to make their creations move intelligently.
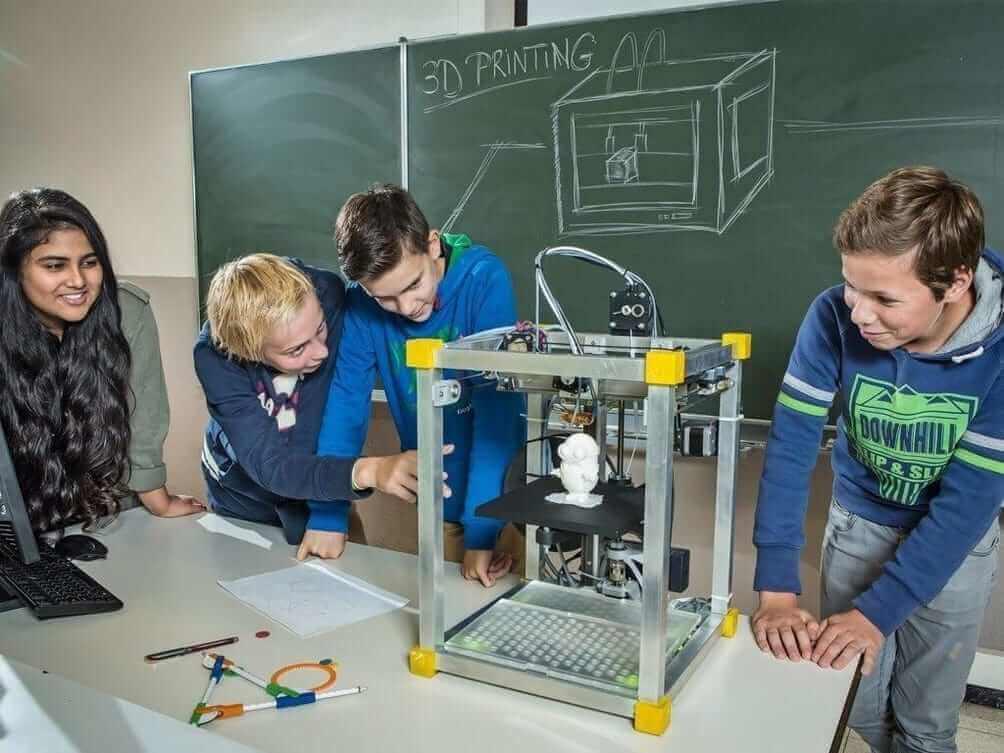
3D printing & design thinking
Students learn to sketch, model, and 3D print components such as wheels or chassis parts. They prototype, test, and refine their designs using a full design-thinking process.

Collaboration & teamwork
Partner projects rotate roles such as driver, coder, and designer, encouraging communication, planning, and problem-solving as teams prepare for test runs and races.
Creativity & grit
Each project is a new challenge. Students debug wiring, adjust 3D parts, and fine-tune their code, building resilience, curiosity, and pride in every successful test drive.
Sample Projects
A hands-on progression: creative 3D design, motor control, and a final vehicle challenge.
LED Desk Buddy
A fun first step into 3D modeling.
Students design a small character or mascot in Tinkercad. Their 3D models are printed between sessions, and next class they add a simple LED circuit so the buddy lights up.
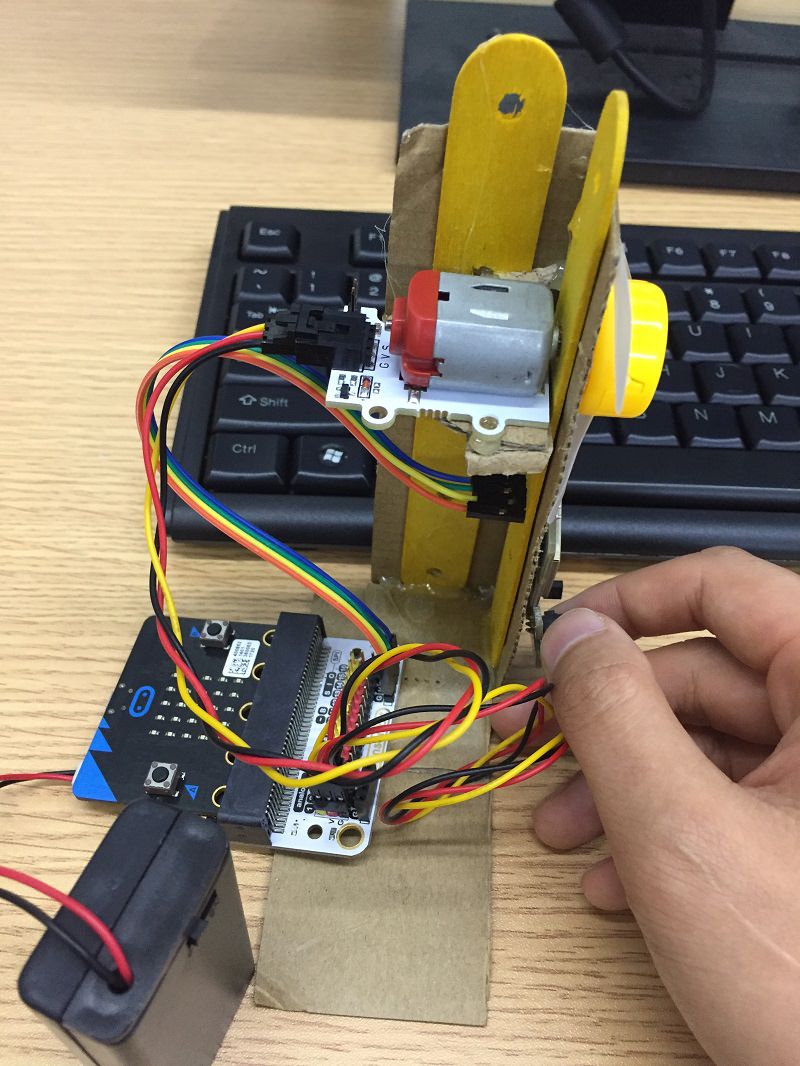
Smart Fan / Spinner
First experience with the motor driver board.
Students connect a servo or DC motor to the driver board and code functions for on/off, speed, and timing. They can also experiment with triggers such as buttons or light sensors.
Smart Vehicle Challenge
Final project combining code, sensors, and design.
Teams build and program a Microbit-powered vehicle using a driver board and sensors such as ultrasonic or light detectors. They personalize their designs with optional 3D-printed add-ons, then test and race their vehicles.
Ready to Start Building?
These are three core builds in 3D Printers & Motorized Motion, introducing students to 3D design, motor control, and smart movement.
🚀 Enroll — Next class starts soonProgram Details
Ages
8–12 years old
Term Length
12 weeks
Session Length
90 minutes each
Class Size
Small groups (max 6–8 students)
Location
Quantum Makers Studio, District 2, HCMC
Format
Hands-on, scaffolded learning with real tools and structured guidance
Schedule
1 class per week · after-school and weekend options available
Materials
All tools and components are provided
Make-Up Policy
Make-up sessions available subject to space
Ready to Spark Your Child’s Future?
Join hundreds of families in Ho Chi Minh City who trust us with their children’s STEM journey. Get in touch today!
